
Agora.io is a platform that helps developers embed real-time video and audio streaming in their apps. It provides APIs that are compatible with every platform and application producing real-time audio and video solutions that can easily add real-time engagement (RTE) to your app.
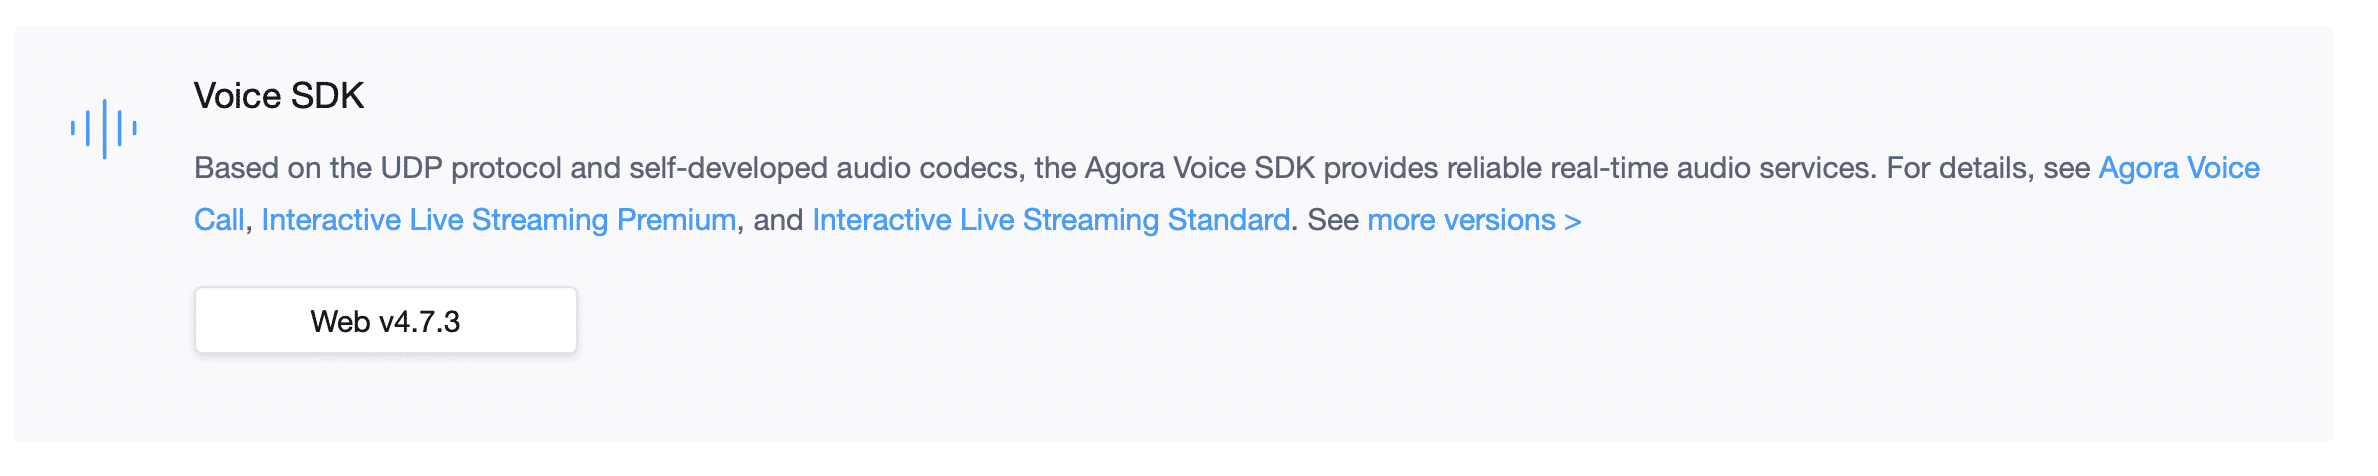
Agora.io offers a wide set of software development toolkits SDKs for different platforms. This includes their Web Voice SDK which you can use to add features related to audio into your website, including voice recording and voice calls.
In this tutorial, you’ll learn more about how Agora.io’s Web Voice SDK can be useful in different projects, and you’ll see it in action as you follow along to create a website that allows users to record audio and save it.
Why Agora.io
If you think about your everyday activities, you’ll realize that you use services that provide real-time communication (RTC) often. When you make a phone call, attend an online meeting, or record voice messages in your daily chats, all of these actions require real-time streaming of audio or video.
Building these solutions in your app or website from scratch would be incredibly costly both in time and resources. It would also be inefficient if it’s just a part of your app rather than the main feature.
Instead of building out your own solution, you can rely on Agora.io’s services, which have been perfected and can be used on many platforms by utilizing their SDKs. For instance, you can embed real-time voice and video streaming in your mobile apps, games, desktop software, or websites.
Using Agora.io’s Web SDK in particular, you can easily add all these aforementioned functionalities and services into your website.
Build the Website
Agora.io’s Web Voice SDK can be used for different kinds of application models; including a broadcast application model, which means the audio will be sent to anyone who wants to listen to the ongoing call or conversation. You can also use it for a one-on-one application model, where there’s connection between two sides only and they’re also the only ones allowed to listen to the audio.
In this section, you’ll create a website that allows the user to log in and record their audio. Then, you’ll extract the raw audio data.
The code for this tutorial is in this GitHub repository.
Prerequisites
This tutorial uses Node.js and NPM. You can check if you have them installed using the following commands:
npm -v
node -v
If you don’t have them installed, you can install Node.js from the official website and NPM will be automatically installed as well.
Download the SDK
Before setting up the website, you’ll need Agora.io’s Web Voice SDK. You should download the latest version of the SDK, which is currently version 4.7.3.
Project Set Up
Create a new directory that will hold the code for the website and change it to that directory:
mkdir raw-audio-tutorial
cd raw-audio-tutorial
Then, initialize the project with NPM:
npm init -yThis will create a package.json file with the default values.
Next, install the libraries you’ll use to create this website:
npm i express sqlite3 body-parser nodemon express-session passport passport-local bcryptjs connect-flash cookie-parser ejsHere’s what each library is for:
express: Express is used to create the serversqlite3: lets you interact with an SQLite databasebody-parser: is an Express middleware that allows you to parse the body of an incoming requestnodemon: provides a server that watches for changes and restarts as necessaryexpress-session: maintains sessions in Express- passport and passport-local: is used to manage authentication on your website
bcryptjs: helps to hash and verify passwordsconnect-flash: shows flash messagescookie-parser: an Express middleware that parses cookies in requestsejs: renders EJS views in Express
After you install these libraries, create index.js with the following content:
const express = require('express')
const bodyParser = require('body-parser')
const sqlite3 = require('sqlite3').verbose()
const  bcrypt = require('bcryptjs')
const cookieParser = require('cookie-parser')
const session = require('express-session')
const flash = require('connect-flash')
const app = express()
const port = 3000
app.set('view engine', 'ejs');
app.use(express.static('public/assets'))
app.use(cookieParser('super secret'));
app.use(session({
secret: 'super secret'
}))
app.use(flash());
app.use(bodyParser.urlencoded({ extended: false }))
app.use(bodyParser.json())
app.listen(port, () => {
console.log(`Agora.io app listening at http://localhost:${port}`)
})
This will create a new Express server. It also uses the middlewares body-parser, cookie-parser, express-session, and connect-flash, which you just installed, and sets the view engine to ejs.
Next, add the start script under scripts in package.json which will start the server:
"scripts": {
"start": "nodemon index.js"
},
Now go ahead and test it out. In your terminal, run the following command to start the server:
npm startThis will start the server at port 3000. Because you’re using nodemon, the server will restart whenever there’s a change in any file. This means you can keep it running as you go through the tutorial.
Database Set Up
For the simplicity of the tutorial, you’ll be using an SQLite database. You’ll create the database and its tables if it’s not initially created when the server is started.
The database will have two tables: users which will hold the users that can log in to your website, and user_audios which you’ll store in the user’s audio.
In index.js before app.listen add the following:
const db = new sqlite3.Database('db.sql')
db.serialize(() => {
db.run('CREATE TABLE IF NOT EXISTS users (id INTEGER NOT NULL PRIMARY KEY AUTOINCREMENT, email VARCHAR(255) UNIQUE NOT NULL, password VARCHAR(255) NOT NULL)')
db.run('CREATE TABLE IF NOT EXISTS user_audios (id INTEGER NOT NULL PRIMARY KEY AUTOINCREMENT, user_id INTEGER, filename VARCHAR(255) NOT NULL)')
//create user if it doesn't exist
db.get('SELECT * FROM users WHERE email = ?', ['[email protected]'], function (err, row) {
if (err) {
throw err
}
if (!row) {
db.run('INSERT INTO users(email, password) VALUES (?, ?)', ['[email protected]', bcrypt.hashSync('123123123', bcrypt.genSaltSync(10), null)])
}
db.close()
})
})
This will create the database `db.sql` in the root of the project, if it doesn’t exist. Then, it will create the tables necessary if they don’t exist. After that, it checks if an example user exists in the table. If it doesn’t, it’s added so that you can easily use it later in the tutorial.
Now, run the server if it isn’t already running. You’ll see that a new file db.sql is created in the root of the project.
Add Authentication
In this section, you’ll add authentication to your website.
Start by requiring passport at the beginning of index.js:
const  passport = require('passport')
const  LocalStrategy = require('passport-local').Strategy
Then, add the logic to authenticate a user when they log in:
passport.use(new LocalStrategy(
{
usernameField: 'email',
passwordField: 'password'
},
function(username, password, done) {
const db = new sqlite3.Database('db.sql')
db.get('SELECT * FROM users WHERE email = ?', [username], (err, row) => {
if (err) {
return done(err)
}
if (!row) {
return done(null, false, { message: 'User does not exist' })
}
//check password
if (!bcrypt.compareSync(password, row.password)) {
return done(null, false, { message: 'Incorrect password' })
}
return done(null, row)
})
}
))
This will check if a user exists with the email entered, then checks if the password is correct. If either of the credentials are incorrect, an error will be returned. If no error is returned, the user will be logged in.
Next, you need to add the logic necessary to serialize and deserialize the user. passport needs to know how it should represent the user in a request, which we do in the serialize method. passport also needs to know how it should retrieve the user behind each request, which is done through the deserialize method:
passport.serializeUser(function(user, done) {
done(null, user.id)
})
passport.deserializeUser(function(id, done) {
const db = new sqlite3.Database('db.sql')
db.get('SELECT * FROM users WHERE id = ?', [id], (err, row) => {
done(err, row)
})
})
You’ll also need two middlewares. One of these is used to determine if the current user is logged in:
function isLoggedIn(req, res, done) {
if (req.user) {
return done()
}
return res.redirect('/login');
}
And the other determines if the current user is a guest:
function isGuest (req, res, done) {
if (req.user) {
return res.redirect('/')
}
return done()
}
These two middlewares allow you to protect your routes.
Finally, you need to use passport in your server:
app.use(passport.initialize())
app.use(passport.session())
You’re now ready to implement authentication for your website.
### Implement Authentication
First, add the login route:
app.get('/login', isGuest, (req, res) => {
const obj = { error: ''}
const error = req.flash('error')
if (error.length) {
obj.error = error[0]
}
return res.render('login', obj)
})
This will show the view login and send to the view any errors that were added by passport.
>Views are files under the views directory in your project, which you’ll create next.
Create the directory views. Then, under that directory, create the components directory. Inside the components directory, create head.ejs with the following content:
<meta charset="UTF-8">
<meta http-equiv="X-UA-Compatible" content="IE=edge">
<meta name="viewport" content="width=device-width, initial-scale=1.0">
<title><%= title %> </title>
<link href="https://cdn.jsdelivr.net/npm/[email protected]/dist/css/bootstrap.min.css" rel="stylesheet"
integrity="sha384-1BmE4kWBq78iYhFldvKuhfTAU6auU8tT94WrHftjDbrCEXSU1oBoqyl2QvZ6jIW3" crossorigin="anonymous">
This allows you to reuse these header tags in every view you may need them for.
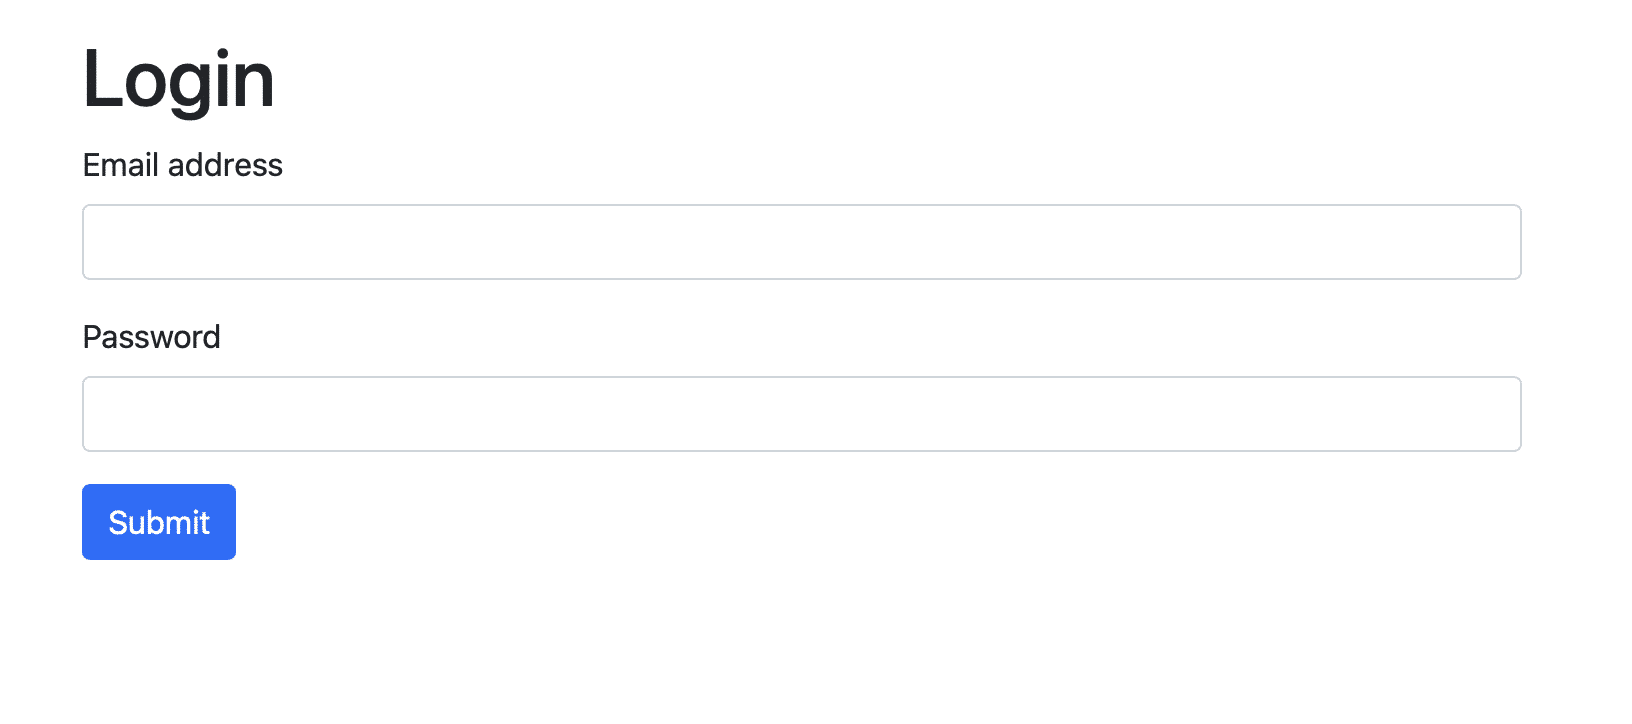
Under views create the view login.ejs with:
<!DOCTYPE html>
<html lang="en">
<head>
<%- include('components/head', { title: 'Login '}) -%>
</head>
<body>
<form action="/login" method="post" class="w-50 mx-auto mt-5">
<h1>Login</h1>
<% if (error.length) { %>
<div class="alert alert-danger" role="alert">
<%= error %>
</div>
<% } %>
<div class="mb-3">
<label for="email" class="form-label">Email address</label>
<input type="email" class="form-control" id="email" name="email">
</div>
<div class="mb-3">
<label for="password" class="form-label">Password</label>
<input type="password" class="form-control" id="password" name="password">
</div>
<button type="submit" class="btn btn-primary">Submit</button>
</form>
<script src="https://cdn.jsdelivr.net/npm/[email protected]/dist/js/bootstrap.bundle.min.js"
integrity="sha384-ka7Sk0Gln4gmtz2MlQnikT1wXgYsOg+OMhuP+IlRH9sENBO0LRn5q+8nbTov4+1p" crossorigin="anonymous"></script>
</body>
</html>
This will show a form with an email and password that the user can use to log in.
Finally, add the POST route to handle the login:
app.post('/login', passport.authenticate('local', { failureRedirect: '/login', failureFlash : true }), (req, res) => {
res.redirect('/');
})
This uses Passport’s middleware to authenticate the user. If the authentication fails, the user is redirected to the login page. If not, they’ll be redirected to the home page.
Add the route for home page:
app.get('/', isLoggedIn, (req, res) => {
return res.render('index')
})
Then, create the file views/index.ejs with the following content:
<!DOCTYPE html>
<html lang="en">
<head>
<%- include('components/head', { title: 'Home'}) -%>
</head>
<body>
<div class="container mt-5">
<h1>Hello</h1>
</div>
<script src="https://cdn.jsdelivr.net/npm/[email protected]/dist/js/bootstrap.bundle.min.js"
integrity="sha384-ka7Sk0Gln4gmtz2MlQnikT1wXgYsOg+OMhuP+IlRH9sENBO0LRn5q+8nbTov4+1p" crossorigin="anonymous"></script>
</body>
</html>
Now let’s test it. If you don’t have the server running, go ahead and run it. Then, go to <code>localhost:3000</code>. You’ll be redirected to the login page.
You can log in as the example user with the email [email protected] and password 123123123. Once you log in you’ll see the home page, which currently shows a “hello” message.

Add Recording
Now, you’ll add the recording functionality using Agora.io’s SDK.
From the SDK you downloaded earlier, extract it and move AgoraRTC_N-4.7.3.js to public/assets/js/AgoraRTC_N-4.7.3.js. Then, link to this script before the closing of the body tag in views/index.ejs:
<script src="/js/AgoraRTC_N-4.7.3.js></script>Add the following after the script you just added:
<script>
document.addEventListener("DOMContentLoaded", function() {
const recordingBtn = document.getElementById('recordingBtn')
const audioData = {
track: null,
channels: []
}
})
//TODO add click event
</script>
This will initialize two variables that you’ll use in the rest of the script to record the audio. You need to add the recordingBtn in views/index.ejs under the heading:
<h1>Recording Home</h1>
<button type="button" class="btn btn-primary" id="recordingBtn">Start Recording</button>
Now add a click event listener, which will start and stop recording accordingly. When the recording starts, you’ll create an `IMicrophoneAudioTrack` which will take the audio from the user’s microphone.
Replace the previous //TODO add click event with the following:
recordingBtn.addEventListener('click', function () {
if (!audioData.track) {
//start recording
AgoraRTC.createMicrophoneAudioTrack().then((track) => {
audioData.track = track
recordingBtn.innerText = 'Stop'
//TODO get raw data
})
} else {
//TODO stop recording
}
})
createMicrophoneAudioTrack returns a promise that fulfills to an IMicrophoneAudioTrack. You can use this track to manage and playback the recording.
Next you’ll use this track to obtain the audio’s raw data. To do this, you’ll use the `setAudioFrameCallback` method. This method sets a callback which will be called continuously until the recording stops.
The callback will have as a parameter an AudioBuffer instance which can obtain raw audio data in Pulse-Code Modulation (PCM) format. This format will be an array of type Float32Array.
Replace //TODO get raw data with the following:
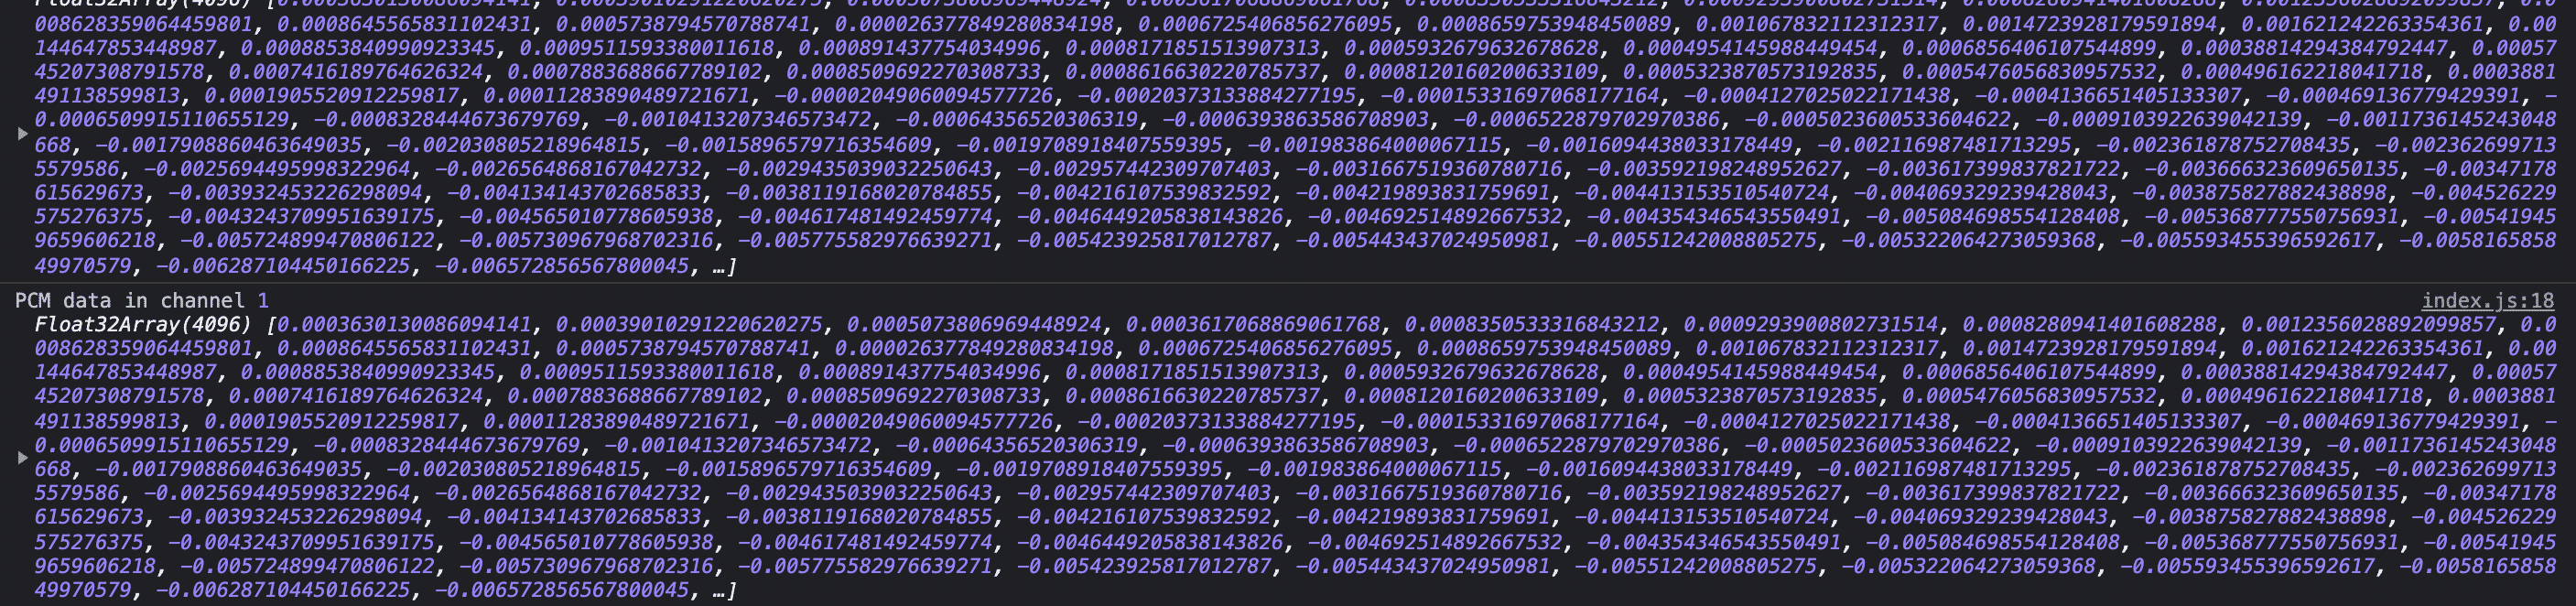
audioData.track.setAudioFrameCallback((buffer) => {
for (let channel = 0; channel < buffer.numberOfChannels; channel += 1) {
// Float32Array with PCM data
const currentChannelData = buffer.getChannelData(channel);
console.log("PCM data in channel", channel, currentChannelData);
audioData.channels.push(currentChannelData)
}
})
In this code snippet, you obtain the PCM data and add it to the array inside the audioData variable that you created earlier. The audio data is aggregated together to form the entire recorded audio.
Finally, you need to add the functionality to stop the recording. Replace //TODO stop recording with the following:
//stop recording
audioData.track.setAudioFrameCallback(null)
audioData.track.close()
// Do something with the audio data
//reset data to restart recording
audioData.track = null
audioData.channels = []
recordingBtn.innerText = 'Start Recording'
To stop executing the callback that you set earlier to record the audio, you need to use setAudioFrameCallback again but pass it a null value. Then, you stop the recording with the close method.
At this point. You have the PCM data in audioData.channels. You can pass this audio to the server and have it undergo preprocessing, which means performing any change required on the audio before it’s in the required format or form needed. For example, you can remove any sounds that are not required to be part of the audio.
The audio can also undergo post-processing, which is any manipulation that you might need to perform on the audio like resampling it or reducing noise in it.
Prepare for Another Recording
Finally, you reset audioData‘s properties to be ready for another recording.
You can go ahead and test it out. Start the server if it isn’t running, then go to localhost:3000 and log in (if necessary). Now, you should see a Start Recording button on the home page. Before you select it, open the console so you can see the PCM data printed there.
Next, click on Start Recording. If you haven’t given permission to use the microphone on localhost before, you’ll get a prompt to allow the website to use the microphone.
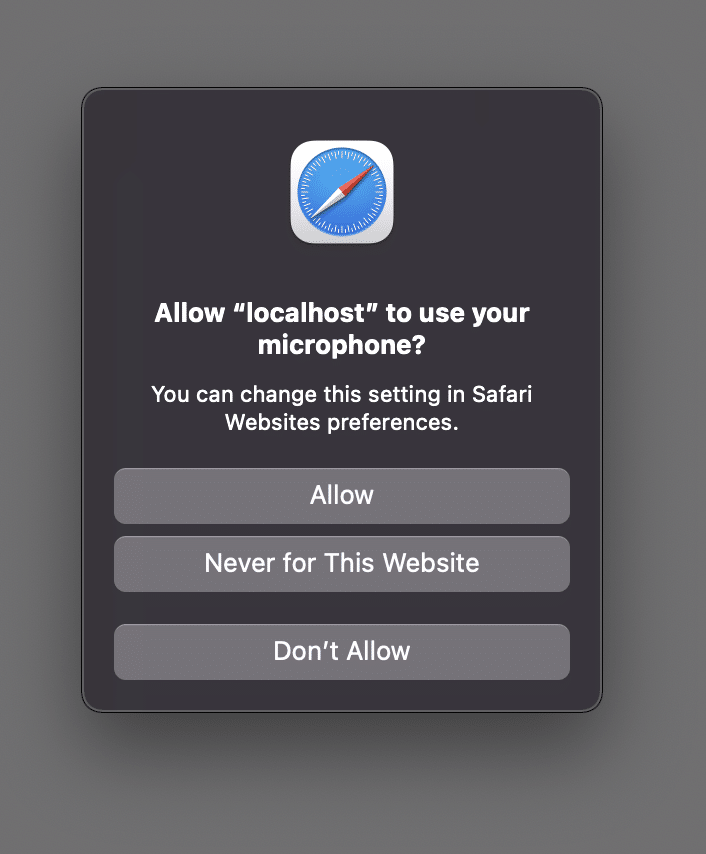
After allowing it, the recording will start and you should see Float32Arrays in the console as the recording continues. This is the raw audio data.
If you click on the same button to stop the recording, you’ll see that the printing to console has stopped when the recording stopped.
If you want to store the audio, you can pass the raw audio data to your server. The Float32Arrays can be transformed to base64 string and then transmitted to your server. Then you can store it as an audio file in the user_audios database table.
You can also use libraries like pcm.js to convert a PCM array to playable .wav audio.
Conclusion
Agora.io lets you add video and audio RTC into your app using their wide variety of SDKs and services. In this tutorial, you learned how to use Agora.io’s Web SDK to record raw audio data from the user’s microphone.
Among the services that Agora.io provides, a partnership has been formed between Agora.io and Symbl.ai that allows developers to use AI to get value out of interactive multimedia. It provides developers with a wide set of services including speech recognition, conversation analytics, contextual and personalized insights, and more.
About Shahed Nasser
Shahad is a full-stack developer with high expertise in web development. She also loves writing technical articles, as they help her learn, become better, and spread her knowledge in the hopes that it will help someone out there.
Twitter: @shahednasserr