Audio streaming is the transmission of audio from one end to one or more ends, whether to one user, from one user to the server, or between users. If you’ve ever been in a work meeting, listened to an online lecture, or had a phone call with someone, you’ve used audio streaming.
This article explains how to stream audio to a browser using WebSockets and how to use Symbl.ai APIs to transcribe the audio.
What Is Audio Streaming?
Audio streaming is the act of sending audio in real time. Though some cases differ, typically, a client listens to a server that is transmitting this audio stream. Even though the audio is transmitted in chunks to the client, the client is able to hear the audio seamlessly.
Audio streaming is used in various fields and occasions. When people are having an online meeting, the audio is transmitted among all people in the meeting in real time. When you listen to online podcasts, the audio is transmitted directly to you.
The increased use of audio streaming has resulted in an increased need for solutions, like Symbl.ai, to extract data and knowledge from audio. For example, Symbl.ai’s streaming API can be used to get real-time speech-to-text transcriptions, among other functionalities.
Implementing Audio Streaming on Your Browser
This tutorial shows you how to create a Node.js server that can stream an audio file to a browser with WebSockets. You’ll then use Symbl.ai’s streaming API to generate a transcription of the audio. You can find the code for this tutorial on the Symbl.ai GitHub repository.
Here is a diagram displaying the workflow of this blog:

Prerequisites
Before you start, make sure you have Node.js installed. When you install Node.js, npm is installed with it as well.
You also need a Symbl.ai account. You can get started with a free Symbl.ai account if you don’t have one already. After sign-up, you’ll be led to the Symbl.ai platform, where you can take note of the App ID and App Secret. You’ll use these keys later in the tutorial.
Server Setup
Open your terminal in the directory where you want to create the server and run this command to create a new project with npm:
npm init -y
It will create a package.json with the default values in the directory.
Next, install the dependencies you’ll need throughout the tutorial:
npm i nodemon express request ws dotenv
These dependencies include:
Nodemon– to watch for any changes and refresh the serverExpress– to create a serverRequest– to send requests later to get an access token for Symbl.aiWs– to create a WebSocket serverDotenv– to store Symbl.ai’s keys in environment variables.env– to use them in your code.
Create the file .env in the root directory with the following content:
APP_ID=
APP_SECRET=
Use the values for App ID and App Secret from your Symbl.ai platform for APP_ID and APP_SECRET.
Next, create the file index.js in the root directory. This is where the code for the server will be located.
Start by adding the following code:
require('dotenv').config();
const express = require('express');
const request = require('request');
const fs = require('fs');
const { WebSocketServer } = require('ws');
const path = require('path');
const port = 3000;

const app = express();

app.use(express.static('public'));

const wss = new WebSocketServer({
    port: 8080
});

wss.on('connection', function connection(ws) {
    //TODO stream audio
});

app.get('/', (req, res) => {
    res.sendFile(path.join(__dirname, 'public', 'index.html'));
});

app.listen(port, () => {
    console.log(`App listening at http://localhost:${port}`);
});
This code creates a server with express and a WebSocket server with ws. The Express server runs on http://localhost:3000, whereas the WebSocket server runs on ws://localhost:8080.
Finally, add the start script that starts the server in package.json under scripts:
"scripts": {
    "start": "nodemon index.js"
}
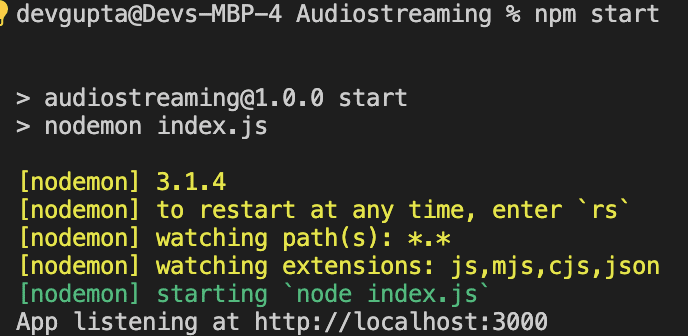
Test it by running the following command on your terminal:
npm start
You should see the message “App listening at http://localhost:3000.”
Web Page Creation
Next, create the web page that the audio will be streamed to.
Create the directory public and create index.html inside that directory with the following content:
<!DOCTYPE html>
<html lang=”en”>
    <head>
        <meta charset=”UTF-8″>
        <meta http-equiv=”X-UA-Compatible” content=”IE=edge”>
        <meta name=”viewport” content=”width=device-width, initial-scale=1.0″>
        <title>Stream Audio and Get Live Speech</title>
        <link href=”https://cdn.jsdelivr.net/npm/[email protected]/dist/css/bootstrap.min.css” rel=”stylesheet” integrity=”sha384-1BmE4kWBq78iYhFldvKuhfTAU6auU8tT94WrHftjDbrCEXSU1oBoqyl2QvZ6jIW3″ crossorigin=”anonymous”>
    </head>
    <body>
        <div class=”container mx-auto my-4″>
            <h1>Stream Audio and Get Live Speech</h1>
            <div class=”form-group”>
                <label for=”name”>Name</label>
                <input type=”text” id=”name” name=”name” class=”form-control” />
            </div>
            <div class=”mt-3″>
                <button type=”button” id=”startStream” class=”btn btn-primary”>Start Stream</button>
                <button type=”button” id=”playButton” class=”btn btn-primary d-none”>Play Audio</button>
            </div>
            <div class=”row mt-3″>
                <div class=”col”>
                    <h2 class=”mb-2″>Accurate Speech to Text</h2>
                    <div id=”accurateText”>
                        <div class=”spinner-border d-none” role=”status”>
                            <span class=”visually-hidden”>Loading…</span>
                        </div>
                    </div>
                </div>
                <div class=”col”>
                    <h2 class=”mb-2″>Less Accurate Speech to Text</h2>
                    <div id=”lessAccurateText”>
                        <div class=”spinner-border d-none” role=”status”></div>
                    </div>
                </div>
            </div>
        </div>
        <script src=”https://cdn.jsdelivr.net/npm/[email protected]/dist/js/bootstrap.bundle.min.js” integrity=”sha384-ka7Sk0Gln4gmtz2MlQnikT1wXgYsOg+OMhuP+IlRH9sENBO0LRn5q+8nbTov4+1p” crossorigin=”anonymous”></script>
        <script>
            //TODO get audio stream…
        </script>
    </body>
</html>
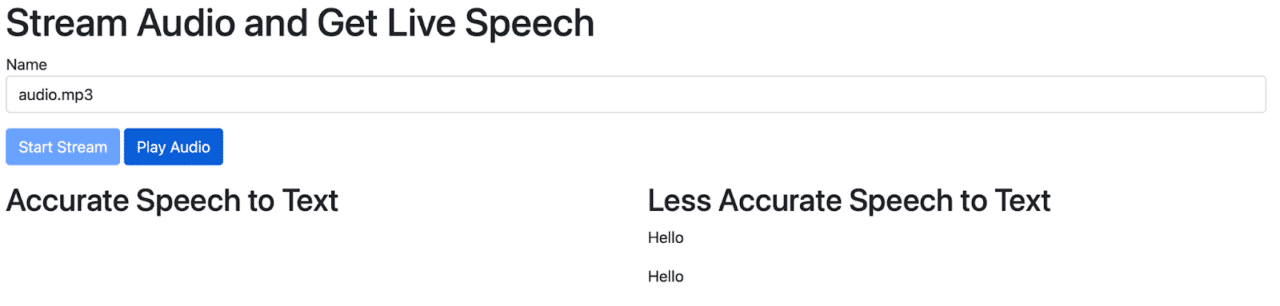
This page should show a name input, which will be used for the name of a meeting in Symbl.ai and generate a unique meeting ID. It also shows a Start Stream button that will fetch the audio through WebSocket and a Play button that will appear to play the audio when it’s available.
It should also show two columns—one for accurate transcription and one for less accurate transcription. As Symbl.ai receives the audio buffer, it starts providing a quick but less accurate transcription. Once the audio is fully transmitted, you’ll receive the accurate audio transcription.
Note that you are also linking to Bootstrap for easy styling.
Next, add code in the <script> tag at the end of the body. Start by declaring some variables you’ll use:
const nameElement = document.getElementById('name')
const startStreamButton = document.getElementById('startStream')
const accurateElement = document.getElementById('accurateText')
const lessAccurateElement = document.getElementById('lessAccurateText')
const playButton = document.getElementById('playButton')

let ws = null
let serverws = null
let audio = null
let processor = null
let context = null
This code declares the variables for the different elements in the DOM that you’ll interact with, including the name input, the Start Stream button, the Play button, and the accurate and less accurate transcription elements.
You are also declaring five variables: ws is used to open a WebSocket connection with Symbl.ai’s streaming API, and serverws is used to open a WebSocket with your server, which is where you receive the audio stream. audio, processor, and context are used to play the audio later on.
Next, add an event listener to the click event on the Start Stream button:
startStreamButton.addEventListener(click, function () {
  //get audio stream and transcribe audio
});
Inside the event listener, retrieve the value for the name input. Also, disable the Start Stream button:
const name = nameElement.value ? nameElement.value.trim() : ''
if (!name) {
    alert('Name is required')
    return
}
startStreamButton.disabled = true
Websocket Connection & Authentication Endpoint
Next, you need to open a WebSocket connection with Symbl.ai and then a WebSocket connection with the server you created. This way, as you receive the audio stream from the server, you can pass it to Symbl.ai and get a live speech-to-text transcription. The WebSocket connection to Symbl.ai’s streaming API, which gives you real-time insights, is at the URL wss://api.symbl.ai/v1/realtime/insights/{uniqueMeetingId}?access_token={accessToken}. Generate `{uniqueMeetingId}` from the name the user enters in the input field. Obtain {accessToken} from the Symbl.ai Authentication API, which you’ll need to do from the server side. Before proceeding with the rest of the script in index.html, open index.js and add the following endpoint:
app.get('/authentication', (req, res) => {
    const authOptions = {
        method: 'post',
        url: "https://api.symbl.ai/oauth2/token:generate",
        body: {
            type: "application",
            appId: process.env.APP_ID,
            appSecret: process.env.APP_SECRET
        },
        json: true
    }

    request(authOptions, (err, response, body) => {
        if (err) {
            console.error('error posting json: ', err)
            return res.json({ success: false, message: 'An error occurred, please try again later' })
        }
        return res.json({ success: true, accessToken: body.accessToken })
    })
})
When you send a request to /authentication, a POST request to https://api.symbl.ai/oauth2/token:generate with the App ID and App Secret will be sent. If an error occurs, an error message will be returned. If the request is executed successfully, the access token to be used will be returned. Back in public/index.html, add the following code in the click event listener after the previous code has been added:
// Send a request to the server
fetch('/authentication')
    .then(response => response.json())
    .then((data) => {
        if (data.success) {
            const accessToken = data.accessToken
            // TODO: open web socket connections
        } else {
            alert(data.message ? data.message : 'An error occurred, please try again later')
            startStreamButton.disabled = false
        }
    })
    .catch((err) => {
        alert(err.message)
        startStreamButton.disabled = false
    })
If data.success is true, it means that the request to Symbl.ai’s authentication API was successful and you can use the access token. In the place of the TODOcomment, create a unique meeting ID from the name entered. Then create a new WebSocket instance with the URL to Symbl.ai’s streaming API:
const uniqueMeetingId = btoa(name)
const ws = new WebSocket(`wss://api.symbl.ai/v1/realtime/insights/${uniqueMeetingId}?access_token=${accessToken}`)
Next, add an event handler when messages are received from the API:
ws.onmessage = (event) => {
    const data = JSON.parse(event.data)

    if (data.type === 'message_response') {
        accurateElement.firstElementChild.classList.add('d-none')
        for (let message of data.messages) {
            const p = document.createElement('p')
            p.innerText = message.payload.content
            accurateElement.appendChild(p)
        }
    }

    if (data.type === 'message' && data.message.hasOwnProperty('punctuated')) {
        lessAccurateElement.firstElementChild.classList.add('d-none')
        const p = document.createElement('p')
        p.innerText = (data.message.isFinal ? 'Final: ' : '') + data.message.punctuated.transcript
        lessAccurateElement.appendChild(p)
    }
}
If the data that is sent has a property type that is message_response, the accurate transcription is received and displayed in its section. If the `type` property is just message and the message property has a nested property punctuated, the less accurate transcription is displayed in its section. Next, add a handler in case an error occurs in the WebSocket connection:
ws.onerror = (err) => {
    console.error(err)
}
Also add a handler for when the connection is closed:
ws.onclose = (event) => {
    console.info('Connection to websocket closed')
    ws = null
    serverws = null
    audio = null
    processor = null
    context = null
    startStreamButton.disabled = false
    playButton.classList.add('d-none')
}
In case the connection is closed, reset the values for ws, serverws, audio, processor, and context to null if the user wants to start the streaming again. You also hide the Play button again and enable the Start Stream button. Finally, add a handler for when the connection is open. You need to send a message with the type start_request to Symbl.ai:
ws.onopen = (event) => {
    ws.send(JSON.stringify({
        type: 'start_request',
        meetingTitle: name,
        config: {
            speechRecognition: {
                encoding: 'LINEAR16',
                sampleRateHertz: 44100,
            }
        }
    }))
}
Notice that you pass a `config` option, which has the property `speechRecognition`. It ensures that you receive the speech-to-text messages. Your connection to Symbl.ai’s streaming API is now ready. The only thing left is to stream the audio from the server to the browser. Before you write that code, you must obtain a sample audio file. You can use Free TTS to obtain text-to-speech audio of any text. For example, you can enter “Hello” and download the audio for it. Place the audio in a new directory named audio. Then in index.js, add a handler for WebSocket connections that streams the audio to the client:
wss.on('connection', function connection(ws) {
    const readStream = fs.createReadStream("audio/audio.mp3");

    readStream.on('data', function(data) {
        ws.send(data);
    });

    readStream.on('close', function() {
        ws.close();
    });
});
[createReadStream] takes the first parameter as the path to the file. You pass audio/audio.mp3. The WebSocket server sends the data of the file to the client, and when the file is fully read, the WebSocket connection is closed. All that is left now is to connect from the browser to the server’s WebSocket server in public/index.html. Inside the onmessage handler of ws, add the following code:
if (!serverws) {
    serverws = new WebSocket('ws://localhost:8080/');
    serverws.binaryType = 'arraybuffer';

    serverws.onmessage = async (serverEvent) => {
        const audioBuffer = serverEvent.data;
        const blob = new Blob([audioBuffer], { type: 'audio/mp3' });
        const file = new File([blob], "test.mp3", { type: 'audio/mp3' });

        audio = new Audio(URL.createObjectURL(file));
        audio.addEventListener('ended', () => {
            processor.onaudioprocess = null;
        });

        playButton.classList.remove('d-none');
    };
}
You first open a new WebSocket connection with the server on ws://localhost:8080. You also set the binaryType to arraybuffer. This ensures that the data that is received from the WebSocket server is received as an ArrayBuffer. Then in the onmessage handler, you use the received ArrayBuffer to get a Blob of the audio data, which you then use to create a File instance. After that, you create an Audio instance with the object URL of the file using createObjectURL as the first parameter. This will allow us to, first, process the audio and send it to Symbl.ai and, second, play the audio to the user. The audio should be processed for optimal transcription results in Symbl.ai. Finally, you remove the `d-none` class on the Play button to show it to the user. Now, you need to add the event listener to the click event of the Play button. Add the following before the closing `<script>` tag:
playButton.addEventListener('click', () => {
    if (audio) {
        context = new AudioContext();
        const source = context.createMediaElementSource(audio);
        processor = context.createScriptProcessor(1024, 1, 1);

        processor.onaudioprocess = (e) => {
            if (ws) {
                let buffer = e.inputBuffer || new Float32Array(this.bufferSize);

                const inputData = buffer.getChannelData(0) || new Float32Array(this.bufferSize);
                const targetBuffer = new Int16Array(inputData.length);

                for (let index = 0; index < inputData.length; index++) {
                    targetBuffer[index] = 32767 * Math.min(1, inputData[index]);
                }

                if (ws.readyState === WebSocket.OPEN) {
                    ws.send(targetBuffer.buffer);
                }

                const inputBuffer = e.inputBuffer;
                const outputBuffer = e.outputBuffer;

                for (let channel = 0; channel < outputBuffer.numberOfChannels; channel++) {
                    const input = inputBuffer.getChannelData(channel);
                    const output = outputBuffer.getChannelData(channel);

                    for (let sample = 0; sample < inputBuffer.length; sample++) {
                        output[sample] = input[sample];
                    }
                }
            }
        };

        source.connect(processor);
        processor.connect(context.destination);

        audio.play().catch((err) => {
            playButton.classList.remove('d-none');
        });
    }
});
Here is the full code for index.js:
const express = require('express');
const request = require('request');
const fs = require('fs');
const { WebSocketServer } = require('ws');
const path = require('path');
const port = 3000;

const APP_ID = 'your_app_id';
const APP_SECRET = 'your_app_secret';

const app = express();

app.use(express.static(path.join(__dirname, 'public')));

app.get('/authentication', (req, res) => {
    const authOptions = {
        method: 'post',
        url: "https://api.symbl.ai/oauth2/token:generate",
        body: {
            type: "application",
            appId: APP_ID,
            appSecret: APP_SECRET
        },
        json: true
    };

    request(authOptions, (err, response, body) => {
        if (err) {
            console.error('error posting json: ', err);
            return res.json({ success: false, message: 'An error occurred, please try again later' });
        }
        return res.json({ success: true, accessToken: body.accessToken });
    });
});

const wss = new WebSocketServer({ port: 8080 });

wss.on('connection', function connection(ws) {
    const readStream = fs.createReadStream("audio/audio.mp3");
    readStream.on('data', function(data) {
        ws.send(data);
    });
    readStream.on('close', function() {
        ws.close();
    });
});

app.get('/', (req, res) => {
    res.sendFile(path.join(__dirname, 'public', 'index.html'));
});

app.listen(port, () => {
    console.log(`App listening at http://localhost:${port}`);
});
Stream Audio
You first check if audio is not null. You then create a ScriptProcessorNode using createScriptProcessor, which will be used to perform direct processing on the audio. The processor has an `onaudioprocess` event, which we’ll use to obtain the processed audio to send to Symbl.ai, then output the processed audio to the user. Then you play the audio with audio.play(), which triggers the onaudioprocess event. Notice that the audio processor processes the audio in chunks of length 1024. If you wish to change this value, make sure it’s less than 8192, as that is the maximum byte length accepted by Symbl.ai. The website is now ready for testing. Run the server if it isn’t already running:
npm start
Test and Run
Then open the website at localhost:3000. You should see the name input field with a Start Stream button and two transcription sections.

Enter any name and click Start Stream. You should hear the audio shortly, and then the transcription will be shown under each section. The less accurate section will have more transcriptions until you have the final accurate transcription.
Wrapping Up
In this tutorial, we demonstrated how to stream audio from a server to a browser using Node.js and WebSockets. Additionally, we utilized the Symbl.ai Streaming API to obtain accurate real-time speech-to-text transcriptions. By following the steps outlined, you can set up a Node.js server, create a web page to handle the audio stream, and integrate Symbl.ai’s powerful transcription capabilities.
Whether you’re developing an application that requires live audio transcription or exploring the possibilities of WebSocket communication, the methods and tools covered in this tutorial provide a solid foundation. Sign up for a free Symbl.ai account to get started with real-time transcription and enhance your audio streaming applications today.