
While large language models (LLMs) have firmly pushed AI into the public consciousness in recent years, “AI agents” are poised to dramatically increase the adoption of AI applications. In fact, while the market for AI agents currently sits at just under $5 billion annually, it is projected to reach a staggering $110 billion by 2032.
In this guide, we explore the vast capabilities of AI agents by taking you through how to build a multi-agent chatbot, step-by-step.
What Are AI Agents and How Do They Work?
An AI agent, or autonomous AI agent, is an application or system capable of executing a given task without direct human intervention. When given a task, an AI agent will assess its environment, evaluate its assigned tools, and develop a plan to complete its given goal.
Typical components of an AI agent include:
- AI Model: most commonly an LLM, which is the “brain” of an AI agent, helping to understand tasks, make decisions, create content, etc. The AI model processes the data collected by sensors, makes decisions based on it, and performs actions in pursuit of its assigned task.
- Sensors: an agent’s input mechanisms that enable it to “perceive” its environment, whether digital or physical, and best determine how to complete its task. Sensors collect data from the environment, process it, and take appropriate actions.
- Actuators: an agent’s means of output; for a software agent, these include applications or devices, such as monitors or printers.
How an AI agent operates can be broken down into three stages:
- Task Definition and Planning: giving an agent a task and the tools to accomplish it. With these, the agent can devise a plan to achieve its given goal, which typically involves dividing it into sub-tasks.
- Decision-Making: analyzing the available data from the environment, as well as past experiences, if applicable, and undertaking actions that maximize the chances of completing the task.
- Feedback and Adaptation: monitoring the outcome of actions and evaluating whether they brought it closer to accomplishing the task. The agent can use acquired feedback to adjust its plan and, if instructed, an agent can ask for human intervention if gets stuck.
Multi-Agent Systems
When you connect two or more AI agents, you create a multi-agent system in which agents can collaborate to complete more complicated tasks than a single agent is capable of. Agents within a multi-agent system can be assigned different roles in accordance with their proposed function. For example, one agent can be designated as the planner, which devises the best way to execute the given task, while others are given the role of a coder, analyst, etc.
Frameworks for Creating Multi-Agent Chatbots
AutoGen
AutoGen is a Python-based open-source framework that specializes in the development of applications with AI agents. It enables you to connect multiple components, such as LLMs and data sources, together through agent interactions to streamline the creation of complex systems.
AutoGen allows you a range of diverse conversation patterns to create increasingly intricate systems. This includes complex dynamic conversational capabilities that alter agent topology depending on the conversational flow and the agents’ success at executing their tasks – especially useful when agent interactions can’t be fully anticipated.
Because it abstracts most of its programming logic as agent interactions, AutoGen is intuitive and has an easier learning curve than other frameworks, making it a good choice for non-technical users as well as developers. However, AutoGen is also highly extensible, allowing for customized agent development if one of its ready-made components cannot execute your required task.
crewAI
Like AutoGen, crewAI is a Python-based framework that specializes in AI agents and has gained popularity due to its simplicity. It allows you to create multi-agent systems by assembling crews of agents, which are assigned roles, equipped with tools, and instructed on how to collaborate to achieve a task through backstories.
It enables the development of production-level deployments through its crewAI+ platform, which allows you to convert crews to APIs, incorporate webhooks, and gain insights through performance metrics.
LangChain
LangChain is a comprehensive open-source framework that enables the development of a wide range of AI applications. Its extensive library includes classes for creating autonomous agents, which can be equipped with a diverse selection of tools to create end-to-end systems.
However, while it provides the most functionality, LangChain doesn’t specialize in AI agents in the same way as AutoGen and crewAI, so it’s not straightforward to create multi-agent systems as with the other two frameworks. That said, LangChain is the best choice for creating more intricate AI applications – so it is common for developers and researchers to combine features from LangChain when using AutoGen or crewAI as their primary framework.
Building a Multi-Agent Chatbot: Step-By-Step Implementation
Now that you’ve gained a better understanding of AI agents and multi-agent systems, let us turn our attention to how to build a multi-agent chatbot – with step-by-step instructions.
Choose a Framework
The first step in building a multi-agent chatbot is choosing the right framework. For our multi-agent chatbot, we will use AutoGen because it is specifically designed for building multi-agent systems and offers an intuitive framework that makes an excellent starting point for getting to grips with AI agents.
Choose an LLM
For an AI agent to complete a specified task, you need to provide it with tools, i.e., applications and other resources, with which it can undertake it. To build a chatbot, we’re going to provide our agents with LLMs for their natural language processing (NLP) capabilities.
We are going to use two LLMs to build our multi-agent chatbot, which allows us to harness the capabilities of each to create a more robust and performant system that produces a more diverse range of outputs.
For our LLMs, we will use Gemma, a lightweight LLM developed by Google, and Nebula, Symbl.ai’s proprietary large language model that is specialized to understand human conversations.
Install Packages
Having chosen a framework and deciding which LLMs you’re going to use, you need to prepare your environment by installing and/or importing the appropriate libraries. To build the the multi-agent chatbot, we are going to need to install and import the autogen library. Additionally, to send requests to Nebula, we need to install the request library, to send POST requests, and the json library, to process JSON objects
pip install pyautogen

import autogen
import requests
import json
Agent Configurations
Gemma
With your environment set up, the next step is creating our agent configurations: providing the instructions for how to connect with the LLMs.
Let us start with Gemma – for which we will use LM Studio: a powerful desktop application that grants access to all the open-source LLMs hosted on HuggingFace. As well as being able to download Gemma, we can run the model on LM Studio’s built-in server.
Type Gemma into the search bar at the top of the interface, which will bring up a list of models as shown below.
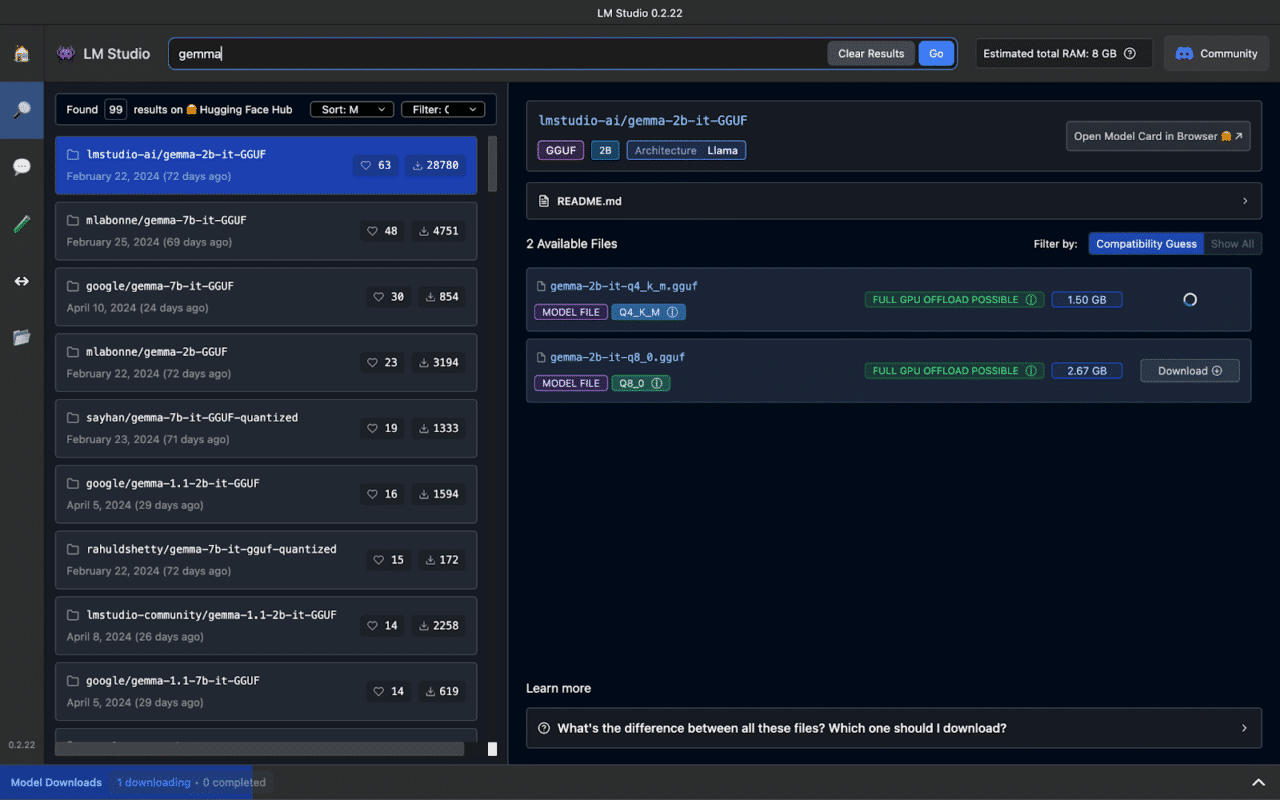
As you will see, the model comes in various sizes, e.g., 2B, 7B, and 9B, with most offering further options in regard to parameter precision, i.e., quantized models. In this example, we are opting for the 2B model, as it will work on a wider range of devices. However, feel free to use a larger model if you have the requisite GPU resources.
Once the model has finished downloading, click Local Server from the menu on the left, which will take you to the interface displayed below.
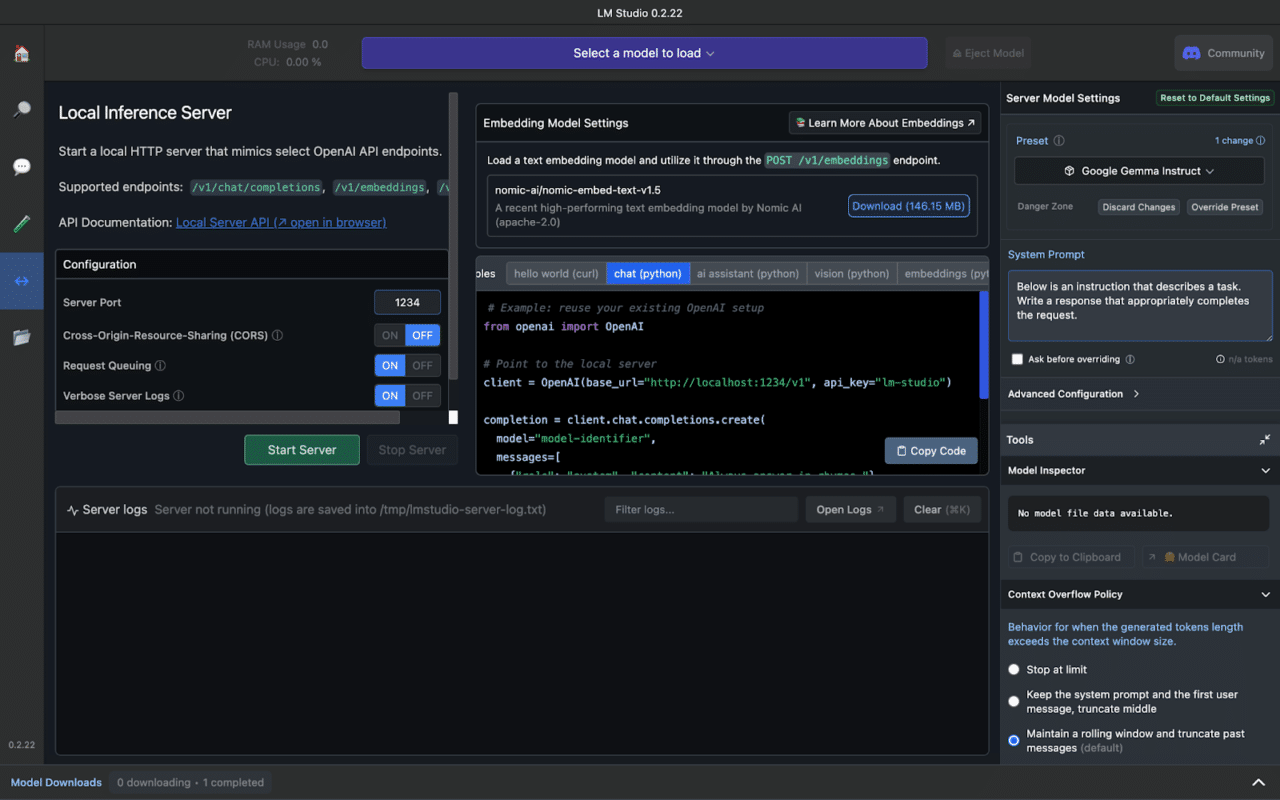
Click on Select a model to load at the top of the interface, where you will see Gemma; select it and the server will start automatically.
The default port server port is 1234, which results in a base URL of “http://localhost:1234/v1” to connect to the model. Also, because LM studio exposes an API that is identical to that of Open AI, conveniently, you can set the API type to open_ai. Finally, the API key should be set to lm-studio.
This results in a config_list like the one below:
config_list = [
   {
       "api_type" : "open_ai"
       "api_base" : "http://localhost:1234/v1"
       "api_key" : "lm-studio""
   }
]
Nebula LLM
To access Nebula LLM, we will connect to it via its API and send it an input prompt as a JSON object via a POST request. For our chatbot, we will pass our initial prompt to Gemma, which will generate output that will then be passed to Nebula LLM for further processing. For this example, Nebula LLM will be used to generate a summary of the content, in this case, a biography, which will then be returned as the final output.
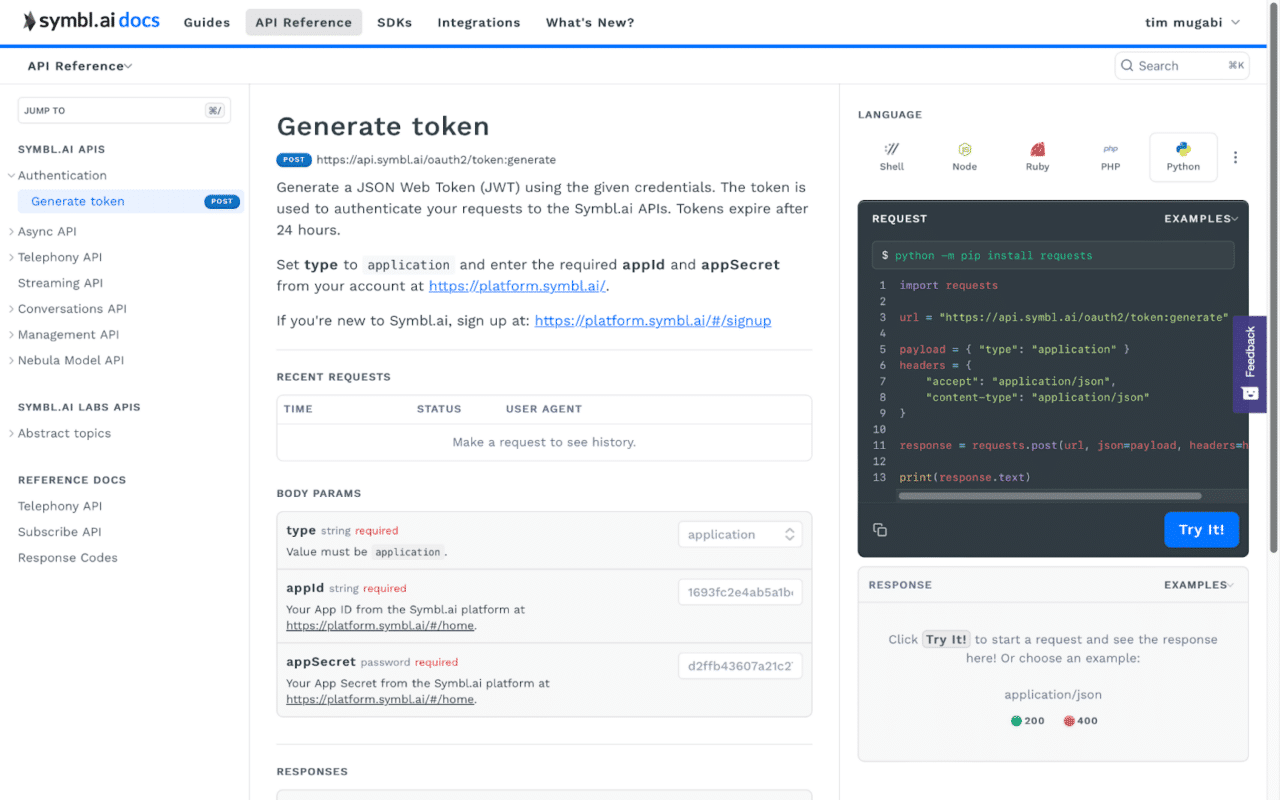
To achieve this, we will take the code used to connect to Nebula LLM (as provided by the Symbl.ai API documentation) and wrap it in a function.
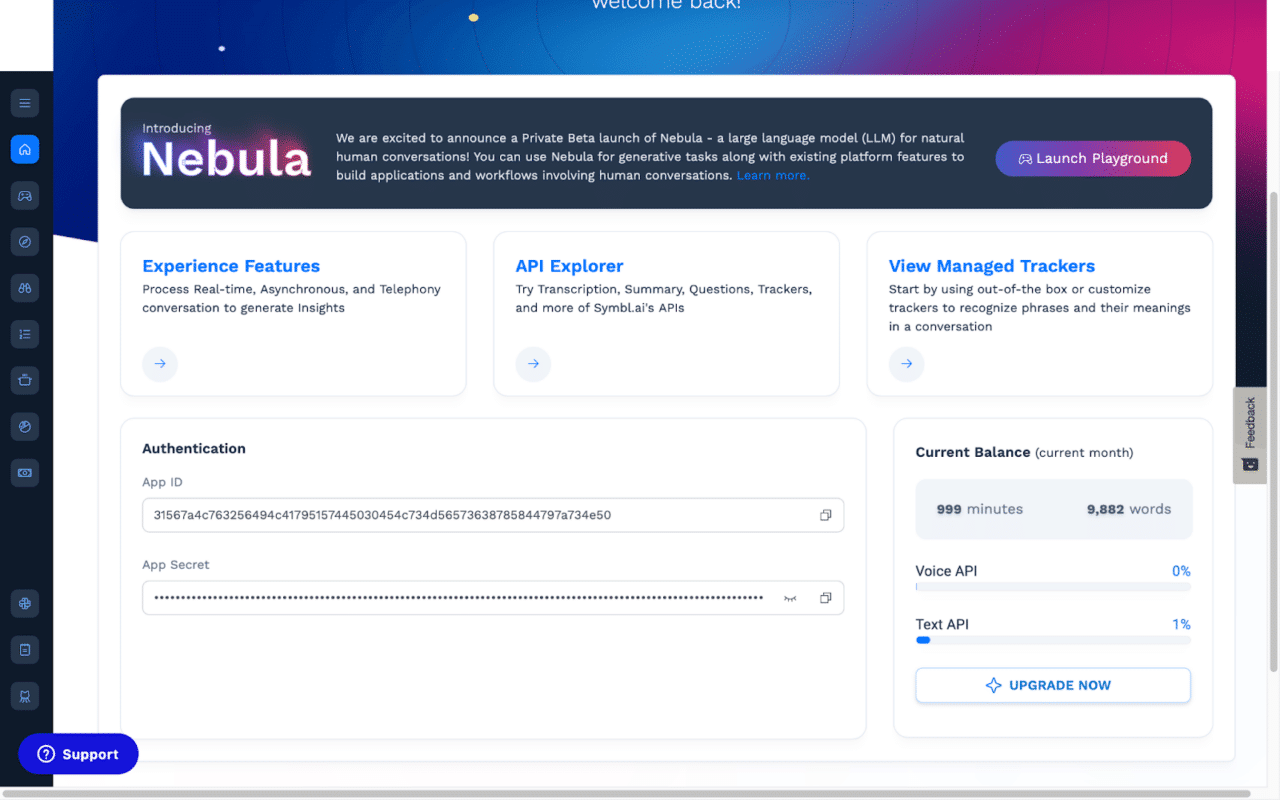
Additionally, to access Nebula’s API, you’ll need an API key, which you can obtain by signing up to the Symbl.ai platform and using your App ID and App Secret.
#set up for calling Nebula LLM as a function

def send_to_nebula(input_prompt):
    url = "https://api-nebula.symbl.ai/v1/model/chat"

    payload = json.dumps({
      "max_new_tokens": 1024,
      "top_p": 0.95,
      "top_k": 1,
      "system_prompt": "You are a text summarizer: you take pieces of text and return clear, concise summaries that are easy to comprehend.",
      "messages": [
        {
          "role": "human",
          "Text": f" take the following text and create a comprehensive summary:\n {input_prompt}",
        }
      ]
    })
    headers = {
      'ApiKey': '<your_api_key>',
      'Content-Type': 'application/json'
    }

    response = requests.request("POST", url, headers=headers, data=payload)

    return response['messages'][-1]['text']
Additionally, we need to make the agents aware of the LLMs by including them in llm_config. In the text below, we have made it aware of Nebula LLM by defining the send_to_nebula in functions and by including the config_list with connection details for Gemma LLM.
""" configuration (llm_config) for AssistantAgent, which includes setting it up to use Gemma as its LLM, and recognise the above send_to_nebula function """

llm_config = {
   "functions": [
       {
           "name": "send_to_nebula",
           "description": "takes output from AssistantAgent and sends to Nebula LLM for summarization",
           "parameters": {
               "type": "object",
               "properties": {
                   "input_prompt": {
                       "type": "string",
                       "description": "input prompt to be passed to Nebula LLM",
                   }
               },
               "required": ["input_prompt"],
           },
       },
          ],
   "config_list": config_list,
}
Create and Initialize Agents
Next, you need to initialize the agents that will comprise your multi-agent chatbot; we will use two types of agents:
- UserProxyAgent: takes user input and passes it to other agents to execute
- AssistantAgent: takes instructions from the UserProxyAgent and executes the specified task.
First, we will initialize the AssistantAgent by connecting it to Gemma and the send_to_nebula function through the llm_config created above. Additionally, you must give the AssistantAgent a name, so you can refer to it when implementing the conversation logic, i.e., starting a conversation between agents: in this instance, we’ve named it chatbot.
# Initialize the AssistantAgent

chatbot = autogen.AssistantAgent(
   name="chatbot",
   llm_config=llm_config,
)
Next, you need to do the same thing for the UserProxyAgent, which in addition to its name (in this case, userproxy), requires a few other key parameters.
The most important of these is human_input_mode, which determines the level of human intervention the UserProxyAgent will seek. There are three options:
- ALWAYS: the agent will ask for human input after receiving a message from other agents
- TERMINATE: the agent will only ask for human input when it receives a termination message
- NEVER: the agent will never ask for human input and will continue the conversation until the task is complete or it reaches the defined
max_consecutive_auto_reply(which is set to 10, for this example).
While ALWAYS is the appropriate setting if you want the user to have a continuous conversation with your chatbot, for our purposes, to offer a simple example, we have set it to NEVER.
Lastly, there is code_execution_config, which specifies how the UserProxyAgent will execute code that it receives in the course of completing its defined task. work_dir is the directory in which it will save any created files (in this instance, it will save them to a folder called “coding”. use_docker, meanwhile, specifies if it will execute the code with Docker, i.e., in a container – which is set to false.
# Initialize the UserProxyAgent

user_proxy = autogen.UserProxyAgent(
   name="user_proxy",
   human_input_mode="NEVER",
   max_consecutive_auto_reply=10,
   code_execution_config={
       "work_dir": "coding",
       "use_docker": False,
   },
Additionally, although the AssistantAgent is aware of the send_to_nebula function, its the UserProxyAgent that will execute it, so it also needs to be made aware of it. To do this, we must register the function, as shown below:
# Register the send_to_nebula function with the UserProxyAgent

user_proxy.register_function(
   function_map={

       "send_to_nebula": send_to_nebula,
   }
)
Implement Conversation Logic
Finally, with both agents initialized, you can start the conversation between them. The UserProxyAgent initiates the conversation, so it must be passed the name of the AssistantAgent, i.e., chatbot, with which to converse. Additionally, crucially, it must also be given a prompt containing instructions for the task you want it to perform, which is stated in the message parameter.
# Initiate conversation between agents, i.e., launch the chatbot

user_proxy.initiate_chat(
   chatbot,
   message="Write a biography for Alan Turing and then send to Nebula for summarization",
)
And with that, you’ve successfully built a multi-agent chatbot!
Use Cases for Multi-Agent Chatbots
Let’s explore some of the applications of multi-agent chatbots.
- Q&A: chatbots can leverage an LLM’s acquired knowledge and NLP capabilities to answer users’ questions. They’re an excellent way to address users’ frequently asked questions (FAQs), for instance, freeing up human agents to deal with more complex queries or perform other value-adding duties. Additionally, if equipped with an LLM that has been fine-tuned for a specific domain, they can act as a knowledge base for a particular subject, such as law, finance, etc.
- Customer Support: in addition to answering FAQs, multi-agent chatbots can enhance other aspects of customer service. They can be used to onboard new customers, ensuring they understand your full range of products and services and which best fit their needs. This helps to increase customer satisfaction and loyalty, which in turn helps boost customer retention.
- Customer Service: as well as customer support, chatbots can be used to improve customer service, offering assistance at every stage of the buying journey. AI agents can guide your customers through your marketing funnel, directing them to the appropriate information, or products, depending on their readiness to make a purchase. When necessary, they can be directed to the appropriate human agent to address any outstanding queries that stand in the way of making a purchasing decision.
- Semantic Search: multi-agent chatbots can be equipped with LLMs and vector databases to offer semantic search capabilities. This can be applied to a range wide of use cases to help users find what they’re looking for with greater accuracy and speed, whether that is products, services, or data.
- Sentiment Analysis: multi-agent chatbots can analyse the sentiment of a conversation in real-time, helping to read between the lines to determine how a customer really feels and, subsequently, how you can best help them. As well as its customer service benefits, this can be used to provide insight to human agents to improve their service or sales skills, thereby increasing their effectiveness and productivity.
- Content Generation: AI agents are extremely useful for creating content, whether using an LLM to create content from scratch or synthesizing multiple pieces of content to create something new. Better yet, AI agents with multi-modal capabilities, can produce content comprised of various types of media, including text, images, audio, video, etc.
- Education Assistant: chatbots can be used to enhance education and training applications by delivering resources that match the user’s competence, rate of progress, and particular needs. This could include providing additional material or changing learning strategies for areas the user finds difficult while skipping topics they’re familiar with.
Conclusion
In summary:
- An AI agent is an application capable of executing a given task without direct human intervention.
- Connecting two or more AI agents creates a multi-agent system that allows agents to collaborate on more complicated tasks
- The steps for building a multi-agent chatbot include:
- Choosing a framework
- Choosing an LLM
- Installing the appropriate packages
- Configuring the agents
- Creating and initializing the agents
- Implementing the conversation logic, i.e, establishing communication between agents
- Use Cases for multi-agent chatbots Include:
- Q&A
- customer support
- customer service
- semantic search
- sentiment analysis
- content generation
- education assistant
To further your understanding of AI agents, we encourage you to experiment by changing parameters, trying different configurations, using different LLMs, and adding more agents, i.e., creating different conversational hierarchies. You can learn more by referring to the resources we have provided below.