In the first part of this tutorial, you saw how to rebuild a video platform like Udemy, using api.video with Next.js, React, and Typescript. However, no modern E-Learning platform is truly complete until the knowledge is accessible in all forms: audio, video, and text. Additionally, it is also important to have content management capabilities such as subject tags, an overview of a lecture for quick recaps, etc.
These simple features, being a part of the regular offline learning experience as they are, go a long way in enhancing the experience and engagement on the online platform, for both the teachers and learners.
In the second part of this tutorial, you will learn how to add transcripts/speech-to-text, as well as AI-generated topics and the summarization of the video lecture using Symbl.ai.
This demo is built using Next.js, React & Typescript. The complete code is available on GitHub in case you want to follow along.
Features
This demo includes the following features:
Speech-to-Text – Video Transcript to make a lecture accessible and more engaging
Topics – Categorical tagging & Overview of lecture based on actual keywords mentioned
Summary – Brief overview of a video lecture for a recap or a quick perusal of content
Enabling Accessibility & Automated Content Management for E-learning Platforms
Before we move on to the code, let us quickly go through the high-level overview of what changes need to be made for this integration to work. If you are already familiar with Symbl, or if you directly want to run the application, you can skip ahead to the demo section.
How Symbl Asynchronous Processing Works
Symbl.ai consumes the pre-recorded media, such as video lectures on an e-learning platform, through our Async API. The Async API is a REST API that is used to submit your video, audio, or text conversation to Symbl, along with some parameters to specify details about the file format, language, and settings for the intelligence features that you wish to use. Symbl ingests each video and once the processing is complete, you can use the Conversation API to retrieve intelligence for that video as many times as necessary.
In a nutshell, the steps for processing a video with Async APIs are –
Submit video file/URL with configuration using a POST Video request (mp4)
Check whether the processing Job is completed in Symbl
Fetch Intelligence using Conversation API endpoints
This needs to be done for each video. Once a video is submitted, you receive a unique Conversation ID from Symbl. This Conversation ID is used to retrieve, update and delete Symbl Insights post-processing. Therefore, the Conversation ID needs to be stored on the client-side along with its associated video.
You also receive a Job ID upon successfully submitting a video. The Job ID is used to check the processing status at Symbl. The processing status is one of the following: scheduled, in_progress, completed, failed.
*Note:Videos sent for processing are not stored with Symbl. Only the generated insights are retained, until they are manually deleted, or the associated Symbl account is deleted.
Enhancing the backend
So far, we have built a website using Next.js, React, and Typescript. You will now expand to add Symbl-related functionality to the Next.js server, the database to store the video IDs with the conversation IDs, and lastly add in some components to display the intelligence in the UI.
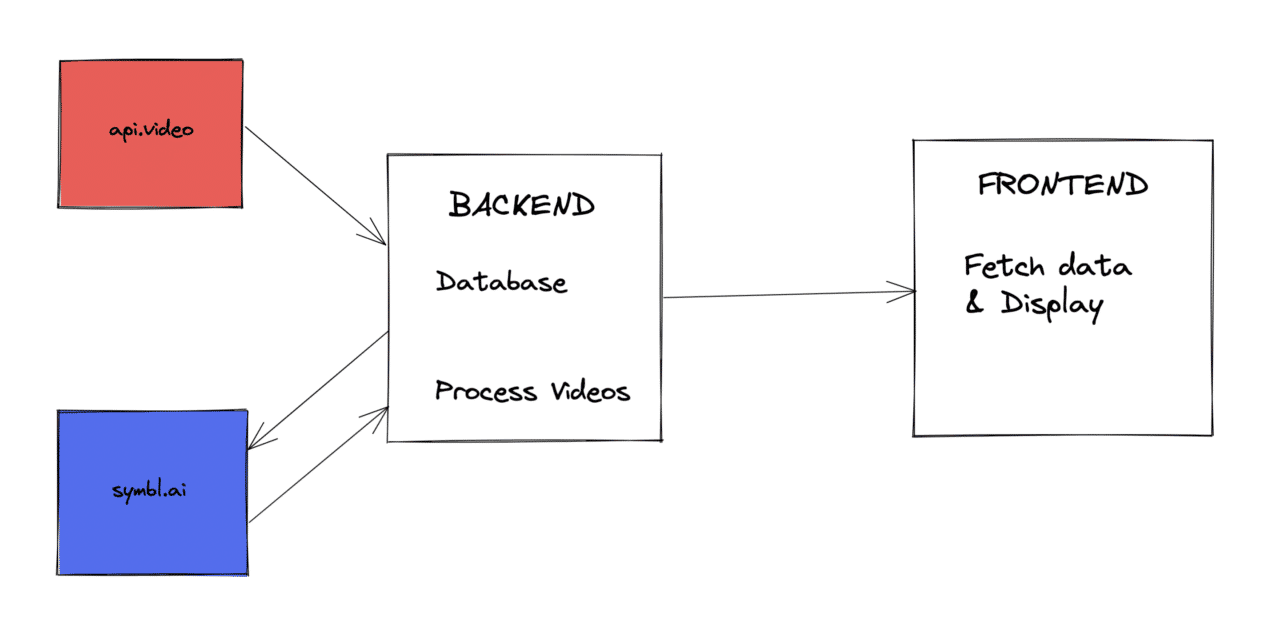
High-level Architecture diagram
A simplified high-level architecture diagram looks like the following:
You will be adding a database to the backend with functionality for maintaining it, and functionality for processing all videos with Symbl. This is explained in more detail in the following sections.
Choosing a database
Choosing an appropriate database for your application is extremely important. Some of the factors to consider are the nature of the data and most frequently used queries, estimated storage volumes, costs, and performance.
While using Symbl with api.video, the primary reason we need a database is to link the videos with their insights. The second reason is to keep track of which videos have already been processed with Symbl and which still need to be processed.
The bare minimum requirements from the database are the following:
Link a video id with the corresponding conversation ID
Update the status of job processing with Symbl
The Video ID is used as the primary key for querying. The two other essential attributes are conversation ID and Symbl processing status. In addition to this, we also chose to save the Video URLs from api.video in the database for quicker access, and the publishedAt field for the video as a sorting parameter. In general, the values would be as follows:
Parameter Name
Type
Description
videoId
String
Api.video’s alphanumeric Video Id
conversationId
String
Symbl’s numeric Conversation Id
videoUrl
String
The mp4 link from api.video, of the form `https://cdn.api.video/vod/${{videoId}}/mp4/source.mp4`
publishedAt
String
The date and time video was created on api.video platform. Date and time are provided using ISO-8601 UTC format.
symblStatus
String
Information on whether the video has been processed with Symbl. Values used in this demo were pending, in_progress with jobId ${{jobId}} and completed
To keep things very basic for this demo, we went ahead and just used a plain old JSON file. For actual applications, you can choose a database of your liking based on all the points mentioned in this section.
Server functionality
Now that we have a database, we need to communicate with it and process the videos. We will expand our Next.js server to perform two additional functions:
Maintain the database – add, update, retrieve and delete video-related data
Make sure that all videos are processed completely by Symbl
Both of these are broad functions and can be broken down into smaller functions. The exact breakdown would vary slightly depending on your tech stack and database design.
Maintaining the database involves periodically fetching user videos from Api.video and updating the database with new videos, as well as updating the existing videos with the Symbl conversation ID and Symbl processing status to in_progress and then completed appropriately.
To make sure all videos are processed completely by Symbl, you need to check the symblStatus and queue all videos with pending status. In the demo, we only process one video at a time.
To process the videos, you need to first fetch an access token from Symbl. Using axios, the function looks something like this:
You can find full details of the Authentication request in our Docs – Symbl Docs | API Reference – Authentication. The access token generated is valid for 24 hours (86400 seconds).
This access token should be passed in the headers of all Symbl requests. The Symbl Async Request to submit a video would look as follows:
Above you can see that the headers have the Symbl accessToken we generate in the last step. The data, or request body, contains the mp4 url that we get from api.video, and the videoId is being used as the conversation name on Symbl, but you can use other parameters accordingly as described in the Async POST Video URL API.
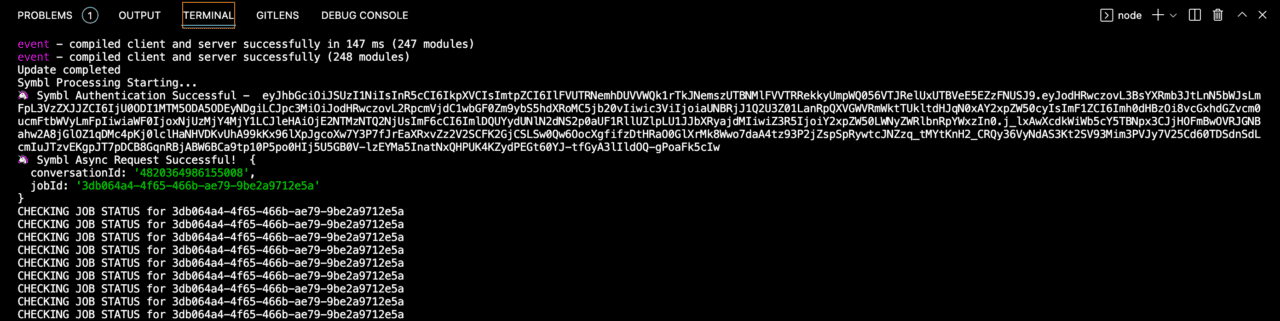
Once you submit the job, you will need to check whether the processing has been completed – if it is not, then we will get only empty or partial results for the insights. In this demo, we used a polling mechanism to check the job status on Symbl, but there is also the provision of adding a Webhook URL in the body of the request should you wish to. You can find the full request body parameters in our Docs here: API Reference – Async POST Video URL.
You can find the full code related to Server functionalities in the udemy-clone-next-typescript/src/services folder.
Fetching Symbl Results into UI Components
Once the processing is complete, you can now fetch the results on the client-side and display them when the user opens the video. In this section, you will see how to get the Speech-to-Text (Transcripts), Summary, and Topics using the Symbl Conversation APIs and have a look at ways you can effectively display them.
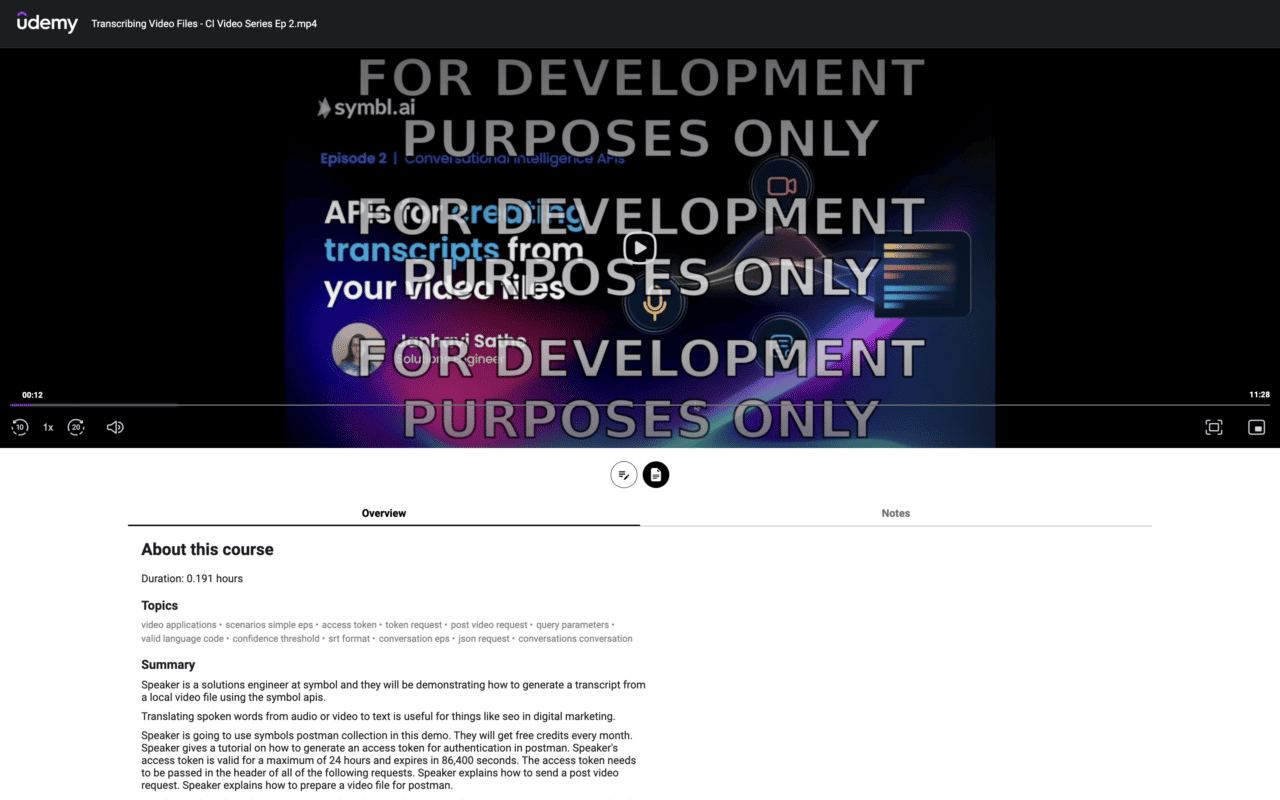
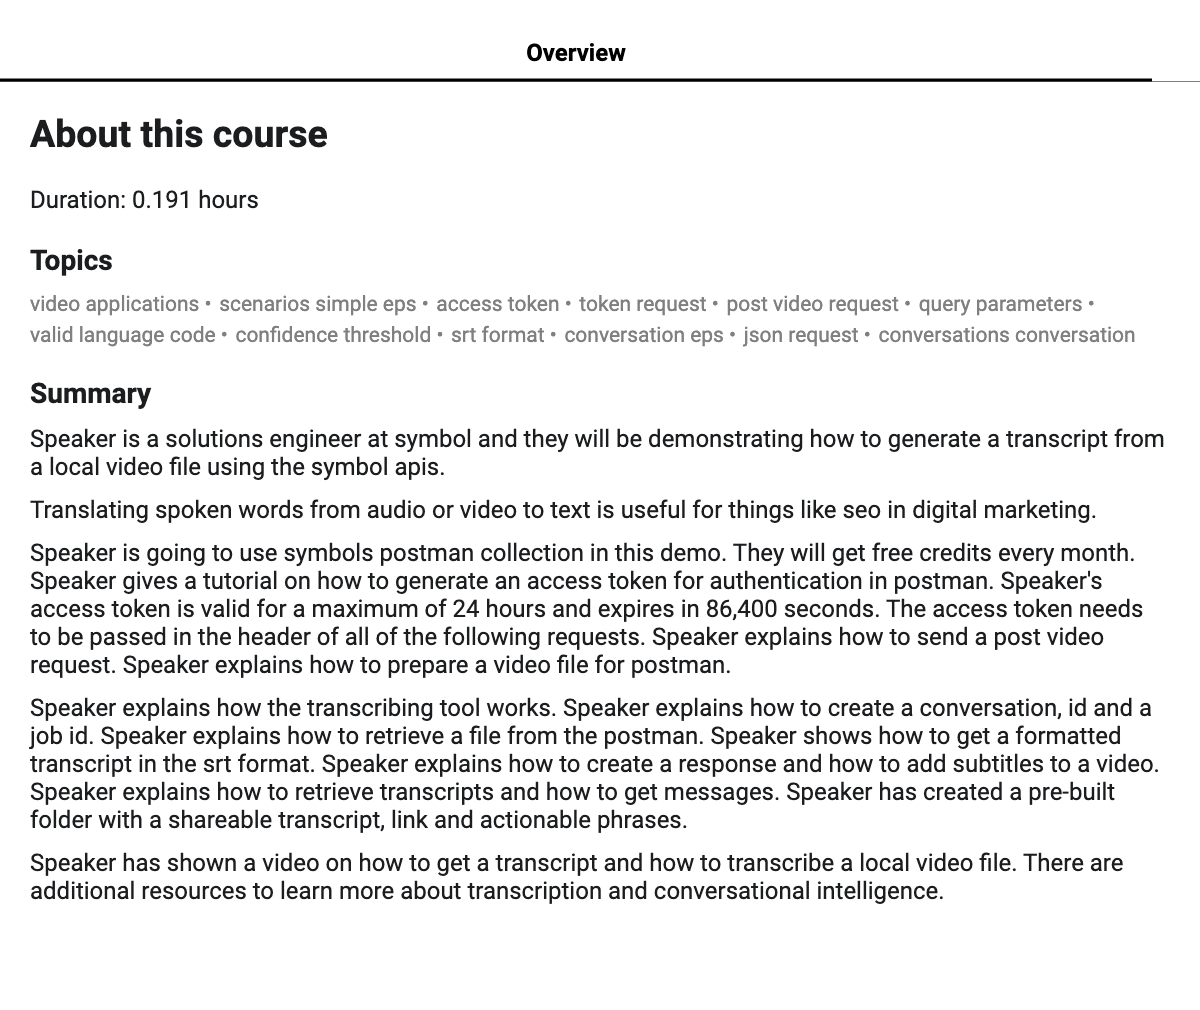
Overview Section
To make it easier to navigate through a series of lectures in an online course, each video should have a summary and a list of keywords from the lecture as part of the lecture overview.
Summary
To generate the Summary of the video you use the GET Summary request from the Symbl Conversation APIs. Our backend handler function using axios is as follows:
This handler is called in the Video component, and takes in the Symbl access token & conversation id.
The response is an array of text strings, which can be interpreted as logical paragraphs of the summary. To display the full summary, traverse the array and display each text as a separate paragraph, or concatenate it and display it as a single paragraph.
Topics
To retrieve the keyword tags, or topics, use the GET Topics request. Our backend handler function using axios is as follows:
This handler is also called in the Video component, and takes in the Symbl access token & conversation id.
The response is an array of topics along with some additional information related to the them, such as sentiment, confidence score. You can display the topics as a string of tags or utilize the additional information for fancier displays such as word clouds based on confidence score, or sentiment color coding.
Transcript Tab
Adding a transcript of the video allows learners to access and engage with the videos in textual medium in addition to audio-visual medium of the video. The transcript also makes it easier to quote parts of the lecture in your notes!
You can fetch the speech-to-text results from Symbl in 3 formats – a JSON Array of sentences, Markdown, and SRT captions.
The JSON Array of sentences can be fetched using the GET Speech-to-Text Messages request. This gives you a sentence-level breakdown of the transcript and provides timestamps, speaker, entities, important phrases, and sentiments for each sentence.
The Markdown & SRT Formats are available as part of the Formatted Transcript. The Markdown format can be used to display the entire transcript in your markdown compatible UI components, and it has parameters to auto-format the transcript and make it presentable and highlight insights. The SRT format can be uploaded as captions for your video, and you can configure it to show the speaker’s name.
For the transcript tab, either the Speech-to-Text Messages or Markdown format can be used. In this demo, we used the Speech-to-Text Messages request. Our backend handler function using axios is as follows:
Same as before, this handler is called in the Video component, and takes in the Symbl access token & conversation id.
The transcript is then displayed in the sidebar. Viewers can toggle the sidebar when they need it. Using the Speech-to-Text Messages instead of Markdown allows us to break the transcript down into smaller messages which are easier to read while watching a lecture, compared to the Markdown transcript which is broken into longer, logical paragraphs which are better for reading through independently.
How to Run the Demo
Pre-requisites
For the second part of this demo, you will need the following:
A Symbl account: Sign up to Symbl for free and gather your Symbl credentials i.e. your Symbl App ID and App Secret.
An Api.video account: Sign up for a free Api.video and grab your Sandbox API Key.
In case you have not completed the first part of the demo yet, you can get the completed code by cloning the Github repo using the following command:
$ git clone https://github.com/apivideo/udemy-clone-next-typescript.git
And then navigate to the folder containing the code by using the following command:$ cd udemy-clone-next-typescriptSwitch to the branch containing the Symbl integration code using the following command:
$ git checkout api-video-symbl
Install the additional dependencies by running:
$ npm install
Environment Variables
From Symbl Platform, grab your API Keys (App ID, App Secret) and store them in the .env file as follows:
SYMBL_APP_ID=xxxxxxxxxxxxxxxxxxxxxxxxxxxxxxxxSYMBL_APP_SECRET=xxxxxxxxxxxxxxxxxxxxxxxxxxxx
Run the app
To start the development server, run one of the following commands:
# run the development server
npm run dev
# or
yarn dev
Navigating the demo
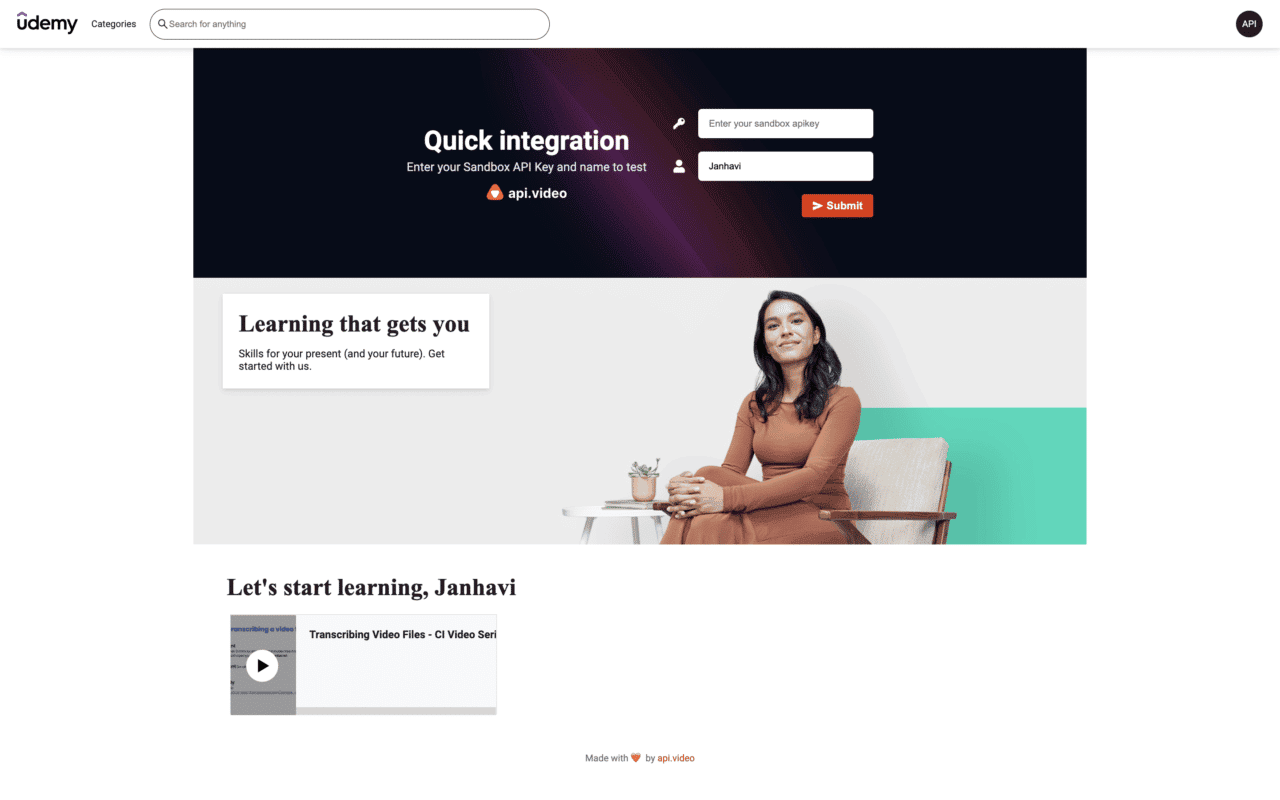
When the demo application is up and running, you will first be greeted by the following page:
In the top right, you can enter your api.video key and your name. At the bottom, you can see the library of videos that you have uploaded to Api.video Dashboard.
You can click on a video to start learning!Once the demo application has started, the server will process all videos one by one, so you will not see insights immediately. You can view the logs to check the processing status.
After the Transcript, Topics and Summary have been generated for the video, you can access them in the application.
You can open the Transcript tab by clicking on the document icon button below the video.
To learn more about different Integrations offered at Symbl, go to our Integrations Directory. Explore solutions for different use-cases from our Solutions page.
For building more intelligence with Symbl, check out our documentation.This guide is actively developed, and we love to hear from you! If you liked our integration guide, please star our repo!
Please feel free to create an issue or open a pull request with your questions, comments, suggestions, and feedback, or reach out to us at [email protected], through our Community Slack or our forum.

![Enabling accessibility & automated content management for E-learning platforms with Symbl.ai 👩🏻🎓 [Part 2]](https://symbl.ai/wp-content/uploads/2022/05/4-Overview-Topics-section.png)